The following blog is in place to document my work and methods towards the 'Single Project' module at Thames Valley University. For this project my plan is to research how to design and implement unique user interfaces and rigging methods for animated characters. I will also look into modelling for animation and explore subjects such as edge loop modelling and polygon facial topology.
Friday, December 22, 2006
Final Model and Render
Finally finished! Above is the final render. I've put the model in 3 different poses to show a range of emotion and rendered them out to a massive resolution for printing. The model has had a good response from CGtalk along with other forums, the link for CGTalk is below:
Although I would love to animate Boris for this project I don't feel that time will allow it due to my other assignments, we will see by week 14. All that's left for me to do now is produce a W.I.P. brochure for this project and author it to DVD.
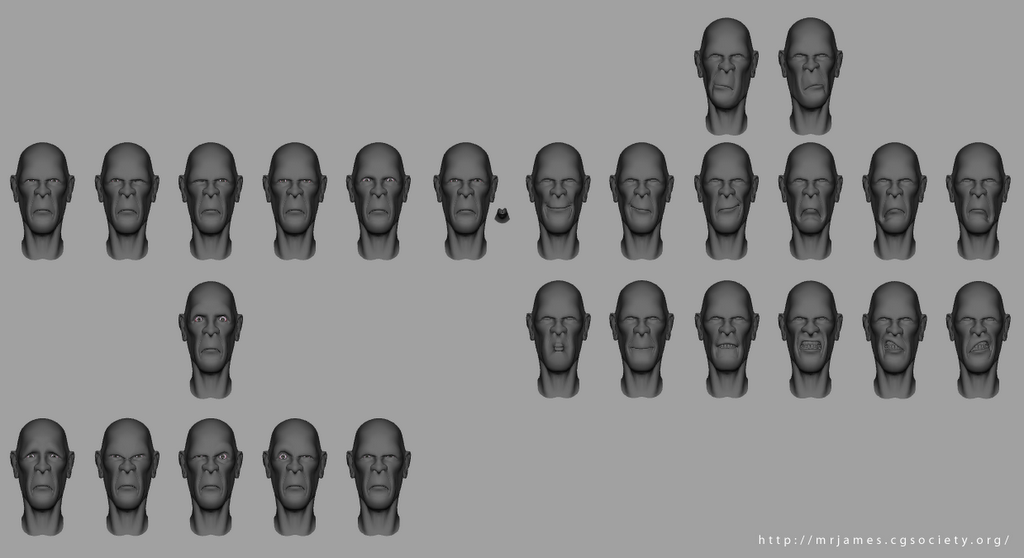
I've been focusing massively on this project lately but have unfortunately neglected this blog by not posting the updates... to simplify things I'll break it down into stages; first off I created a huge blend shape library for this character by using Mudbox and the soft mod tool in Maya. Soft selection in both programs made this task a lot easier because before this technology was around creating blend shapes was based on pushing thousands of vertices and each shape could take hours to realise, with my technique I can create complex shapes within minutes. Obviously this was only possible to do in such a short time with a good mastery of the software but nevertheless it sped up my work flow immensely.
The next step involved creating a user interface that could link all of these shapes and provide animators with control to mix and match different shapes to create complex emotions. I purchased a DVD (Digital Tutors Facial Rigging for Facial Animation) that I found infinitely useful and showed techniques that could give me a robust rig. I used this along with books I have previously mentioned.
The user interface was created with Nurbs Curves in the shape of a head. All channels that were not used were locked and hidden so that an animator could not break the rig even if they wanted to. Each control is also given limit information so that the control cannot be moved further than desired. After this the controls are linked to the blend shapes via set driven keys that then drive the shapes.
There is a lot more to it but for the purpose of the blog I have simplified it to the best of my ability, the rig also has severla other unique features that will be documented in the final report.
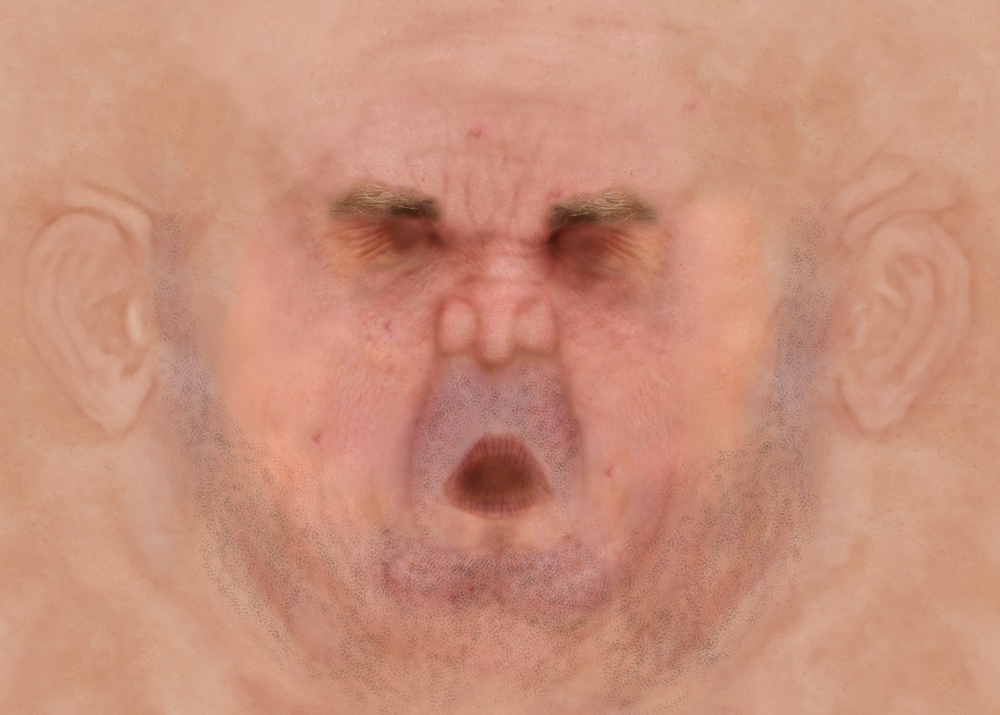
The next step was to texture the model. For this I sampled parts of high res photos and merged them over my uv mapped texture, after a couple of days work I ended up with the result below. Some elements were hand painted and some photo referenced, all in all it gave a very fleshy and skin like feel. The stubble was created with a custom brush in photoshop.
After this I rendered out an image with this mapped on a Blinn shader, the results were far from satisfactory. This was one of the hardest parts of finishing the model. To create a skin shader is enormously difficult, skin has unique qualities that standard materials just don't have, the main one is sub-surface scattering. The skin gets its tone from being made up of several layers, the light penetrates the outer layer which gives skin a rich tone and also enables us to see mottling and blood vessels underneath. The shader I created took a week to develop and was heavily trail and error. The shaders are also dependant on your light setup and fancy shaders take a long time to render. Taking all these things into account along with displacement mapping and global illumination can result in mammoth render times for mediocre results.
However, after a weeks rendering, tweaking and hard slog I was able to get the result below rendered at 720X576 in just over two minutes. I was extremely pleased at this result and can render most animations with this overnight.
So whats left to do? As we speak I am working on the teeth and gums and then all that needs to be done is animate and package the whole project together into something presentable.
First animation test has already been done and can be viewed below: